When I think about holiday nails, “green” always hits different. It feels festive without trying too hard, and it pairs beautifully with gold, silver, white, chrome, glitter – basically everything that screams December.
So I pulled together my favorite Green Christmas Nails ideas that look stylish, fun, a little fancy, and super easy to recreate even if you’re not the most patient person with a nail brush.
Some designs are simple. Some look like you walked out of an expensive salon.
All of them? Holiday ready. If you’re hunting for cozy, bold, sparkly, or minimal, you’ll definitely find something here.
1. Emerald Gloss Almond Nails with Gold Cuticles
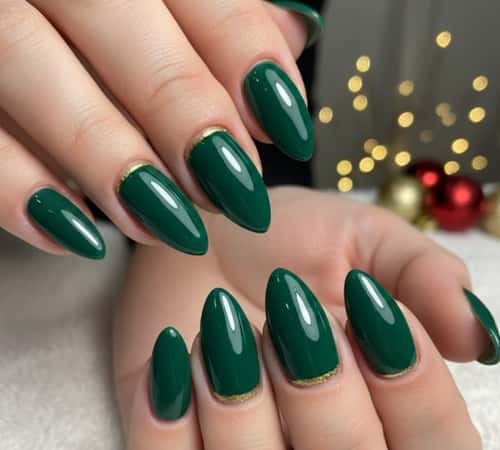
If you want something classy without overthinking it, emerald almond nails with a thin gold cuticle line always look festive.
The trick is choosing a deep jewel-tone polish. Two coats, let it dry, then use a fine liner brush to trace a micro-thin gold curve along the cuticle.
It instantly gives that luxury holiday vibe. Top coat is non-negotiable – it makes the gold pop.
This one works on both long and short almond shapes and looks good with every skin tone. Quick, pretty, done.
2. Green Chrome Snowflake Nails
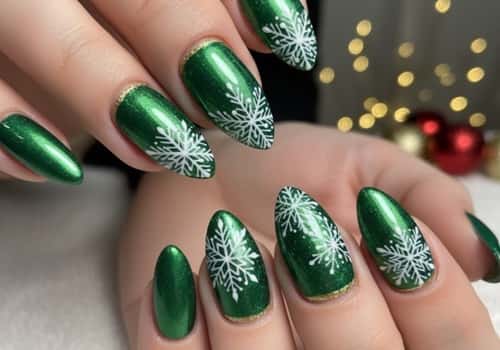
Chrome always feels like cheating because it looks complex but takes five minutes. Start with a forest green gel base. Cure it.
Then rub a chrome powder on top until it shines like a Christmas ornament. Add white snowflakes – freehand or stickers (no shame).
Mix sizes for a more natural look. Seal everything with a glossy top coat. The chrome makes it festive, and the snowflakes make it feel playful without going full cartoon mode.
3. Green French Tips with Glitter Fade

A French tip but make it holiday. Start with a nude or sheer pink base. Paint the tips with a rich pine green – thin, thick, or angled, all work.
Then tap glitter at the edges of the tip and fade it slightly upward. It turns the classic French into something party-ready.
You can match the glitter to the jewelry you wear – silver makes it icy, gold makes it warm and festive. Perfect when you want minimal effort but maximum payoff.
4. Matte Evergreen Nails with White Art Lines
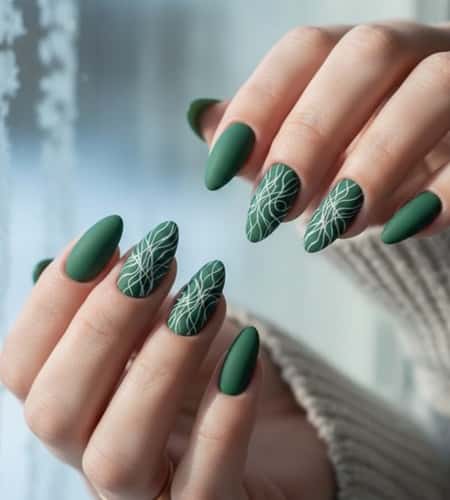
If glossy isn’t your thing, matte finishes always feel modern. Use an evergreen polish, matte top coat it, then draw thin white lines in abstract shapes on two accent nails.
Think swooshes, loops, half curves. The matte base makes the white lines look sharper. It’s simple but artistic – kind of like something you’d spot on Pinterest at 2am while pretending not to procrastinate. Works best on square or coffin nails.
5. Glittery Green Ombre Nails
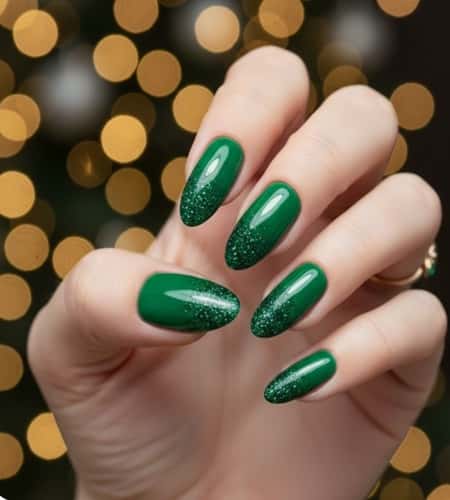
This one screams December but still feels wearable. Start with a soft green or nude base. While it’s still tacky, sponge darker green polish at the tips for that smooth ombre.
Then add fine green glitter just at the tips and blend it upward slightly. The ombre + sparkle combo looks like your nails dipped into a Christmas tree. Seal with a glassy top coat to blend everything together.
6. Forest Green Velvet Nails (Cat-Eye Effect)
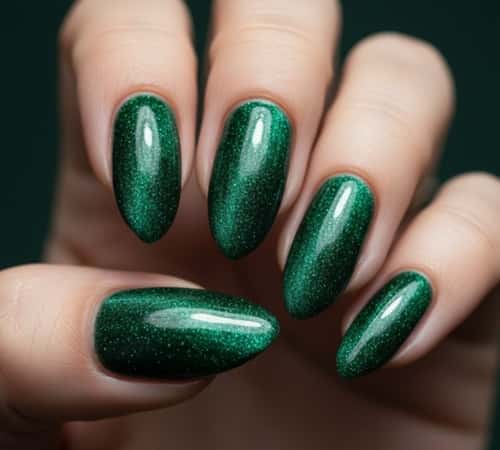
Velvet nails look like magic the first time you try them. Use a forest green magnetic gel polish, paint one nail at a time, and hold the magnet diagonally to pull the shimmer into that soft, fuzzy “velvet” effect.
Change magnet angles for variety – horizontal, vertical, diagonal. It adds movement when you tilt your hand under light. No extra art needed. These nails already look like festive fabric straight off a holiday outfit.
7. Green Plaid Nails with Matte Top Coat
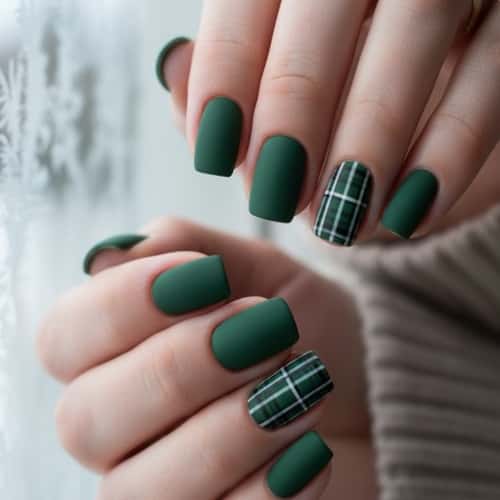
Plaid can look intimidating, but trust me, it’s easier than it looks.
Start with a sage or pine green base. Matte it. Then use a striping brush to paint thin black vertical and horizontal lines.
Add thinner white lines next to them to get that layered tartan effect. Focus on just two accent nails to keep things clean. The matte finish ties the whole look together and stops it from looking too busy.
8. Gold Foil over Deep Green Nails
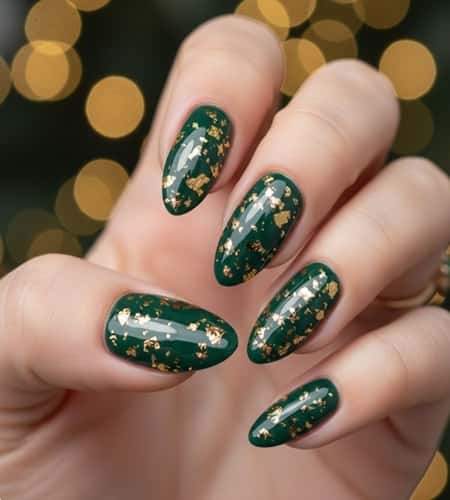
If you want something elegant without drawing a single line, gold foil saves the day. Paint your nails a rich deep green.
While the top coat is still tacky, press small pieces of gold foil randomly across the nails – don’t overdo it.
The foil adds dimension and instantly turns simple nails into holiday jewelry. It looks expensive even if you finished the whole thing in ten minutes.
9. Green Candy Cane Swirl Nails
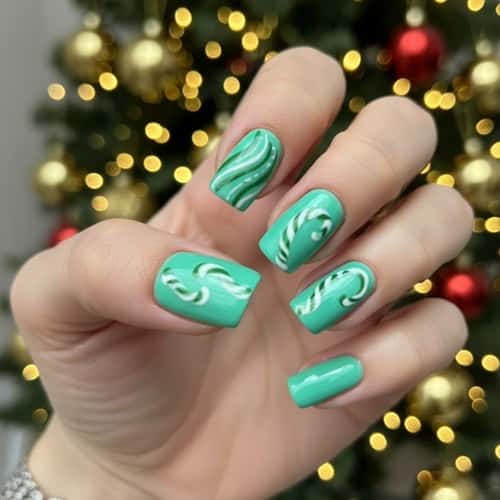
This is a fun twist on the classic red-and-white candy cane look.
Start with a mint or soft green base. Use a white striping brush to swirl curved lines across the nail – thin, thick, wavy, whatever feels right.
Add a darker green swirl in between to give it depth. Seal with glossy top coat to smooth everything out.
It looks cheerful without being overly literal. Plus, swirls are forgiving, so even mistakes look intentional.
10. Dark Green Nails with Silver Starbursts
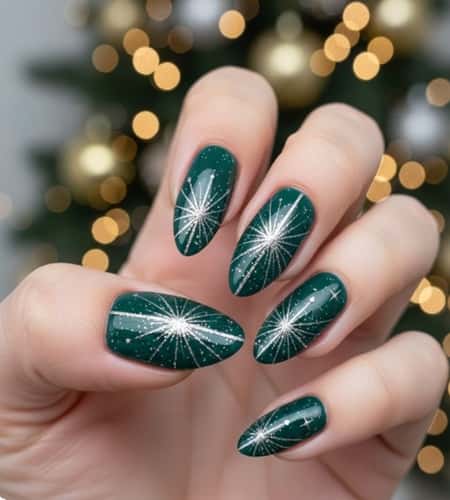
Nothing feels more “December night sky” than starbursts.
Paint nails in a deep midnight green. Then use a fine liner brush to paint tiny silver starbursts – one larger one per nail and smaller dots scattered around.
You can also use star nail stickers if drawing isn’t your thing. The silver picks up reflections from holiday lights, giving the nails a sparkling night-sky vibe.
11. Green Glitter Reverse French Nails
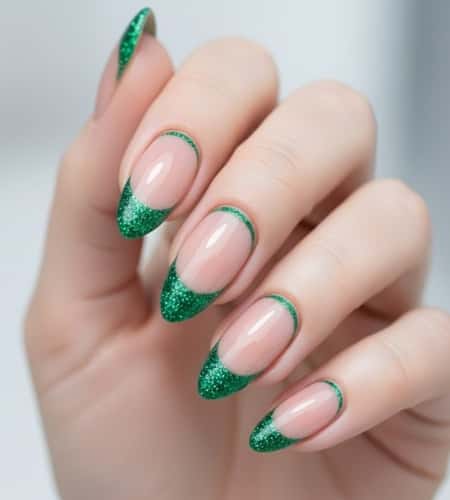
Reverse French designs always look stylish without needing nail-art superpowers.
Start with a sheer nude or soft pink base. Once dry, paint a curved line of emerald glitter at the cuticle instead of the tips.
Keep the curve thin for a cleaner look. If you want extra pop, add a second layer of glitter just on the center to give it more shine.
Finish with a glossy top coat to melt everything together. It’s festive, fast, and honestly way easier than a traditional French.
12. Sage Green Nails with White Snowy Tips
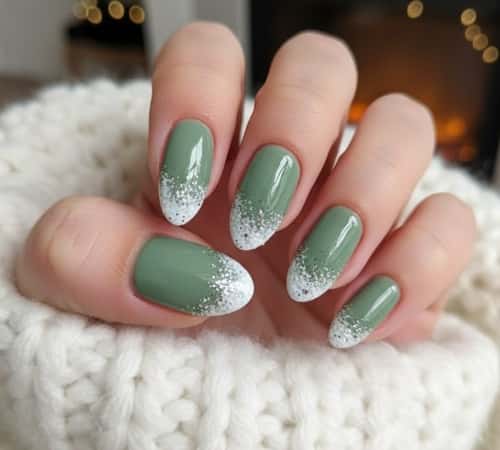
This one feels soft and cozy – almost like winter pajamas but in nail form.
Paint the nails in a light sage green. Let them dry fully. Then use a sponge to dab white polish just at the tips, creating a fluffy snow-tip effect.
Keep it soft and uneven on purpose so it looks natural, not too perfect.
If you want more dimension, add tiny silver dots over the white for “sparkle snow.” Seal with a glossy top coat or matte if you want a frosted look.
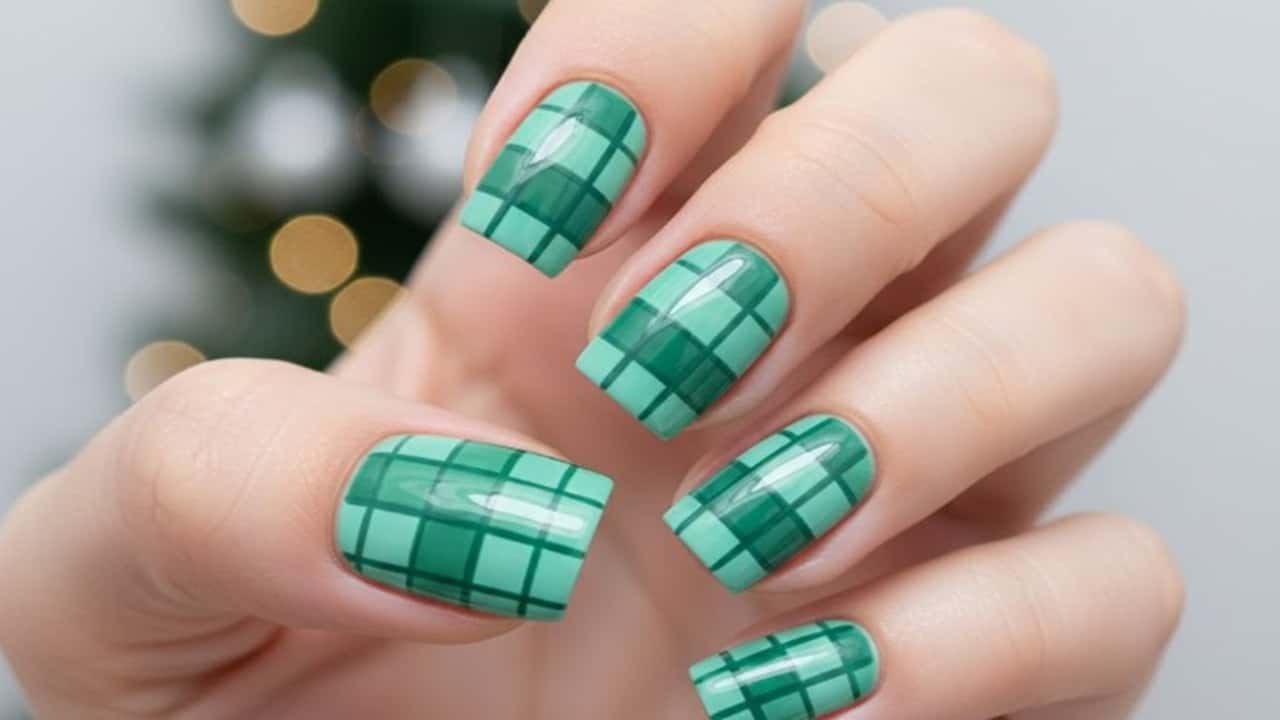
13. Green Checkered Nails with Glossy Finish
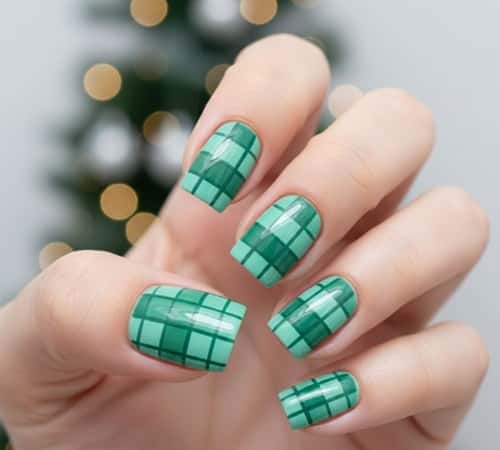
Checkered nails look bold, playful, and surprisingly simple. Start with a mint or jade base.
Then draw alternating squares with a darker green polish using a tiny brush or striping tool.
Don’t stress about perfect geometry – slight imperfections make them look more hand-painted and cozy.
Highlight two or three nails with the checkered pattern and leave the rest solid. Glossy top coat ties everything together and gives that clean, finished look.
14. Emerald Nails with White Tree Silhouettes
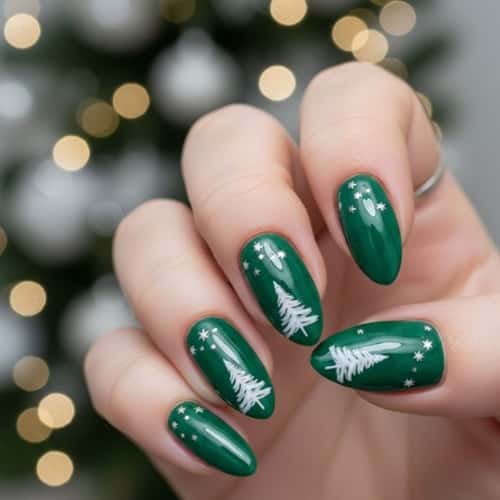
For a design that’s festive without feeling loud, paint the nails emerald.
Once dry, use a fine nail-art brush (or stamping plate) to paint minimalist white tree silhouettes on one or two nails.
Keep them thin, simple, and slightly angled for a natural look. Add a tiny silver dot at the top of each tree for a ‘star.’
It’s subtle but still very holiday-coded. Great if you want something artsy without going full glitter mode.
Final Thoughts
Holiday nails are one of those tiny upgrades that instantly put you in a good mood.
The fun part? You don’t need fancy tools or salon-level skills to pull these off.
What matters most is choosing the right shades of green and layering your details slowly instead of rushing.
If you’re experimenting, start with simple designs and build your confidence – half the charm of holiday nails comes from those tiny imperfections that make them feel handmade.
And if you’re posting these looks online, bright lighting and clean backgrounds make your nail art look 10x better.
Your nails deserve their own moment, especially during the festive season.