If there’s one thing that instantly makes holiday nails feel festive, it’s glitter. And when you mix that sparkle with shades of green, the whole look turns into full-on Christmas energy.
That’s why I put together my favorite Green Christmas Nail Designs with Glitter – easy looks you can recreate without needing salon-level skills.
Some of these designs are bold, some are simple, and some look extra fancy even though they’re embarrassingly easy to do.
Want classic green? Chrome? Forest? Emerald? We’ve got it all. Let’s jump into the glittery madness.
1. Emerald Glitter French Tips
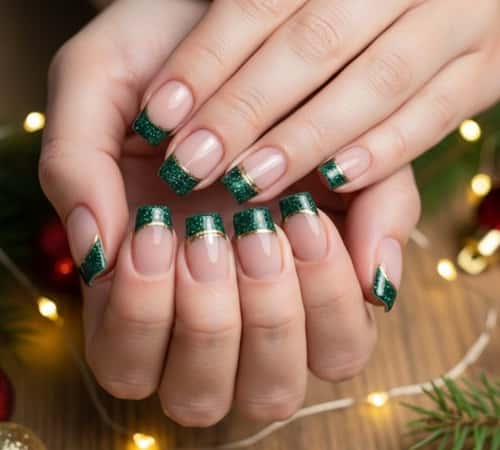
French tips look even better when you swap the classic white for emerald glitter. Start with a nude or sheer-pink base.
Once dry, use striping tape (trust me, it saves your sanity) to outline the tip shape. Apply a dense emerald glitter polish on the tips.
Cure if using gel. Peel tape. If you want a softer look, add a thin gold line under the tip.
Top coat everything so the glitter stays sealed and doesn’t snag on sweaters – because nothing ruins the moment faster.
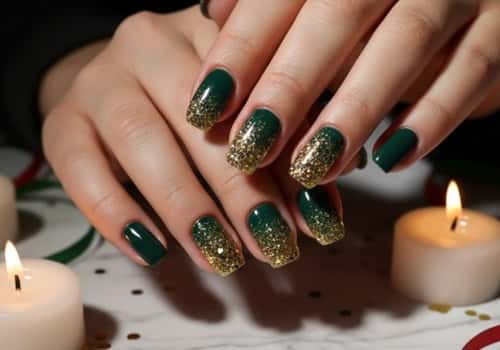
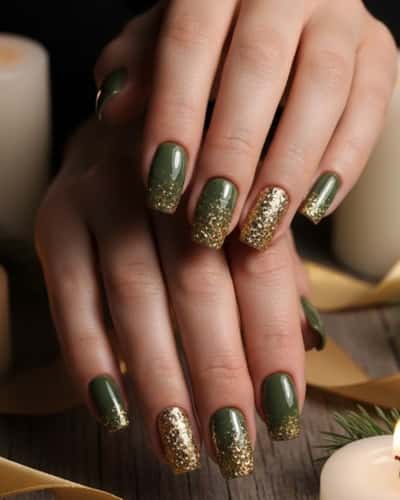
2. Forest Green Nails with Gold Glitter Fade

This one always looks professionally done even though it’s simple.
Paint all nails with a deep forest green polish. Let them dry. Starting at the cuticle, dab gold glitter using a sponge so it creates a soft fade upward.
The trick? Use very little glitter at the top and heavier glitter at the bottom. Don’t over-blend or it gets muddy. Seal with a thick top coat for that “glass” finish.
It pairs beautifully with winter outfits and holiday parties.
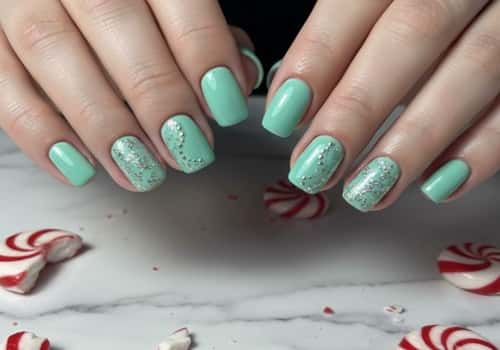
3. Sage Green Glitter Snowflake Nails

If you want something soft and cozy, sage green is a winner.
Paint all nails in a muted sage shade. Add white snowflakes on two accent nails – stickers or stamping plates if freehand isn’t your thing.
While the polish is tacky, sprinkle ultra-fine silver glitter over the snowflakes. The glitter melts into the design and gives them a frosted, delicate look.
Top coat with a glossy or matte finish (both work). Gentle, wintery, and super pretty.
4. Green Chrome Nails with Glitter Accents

Chrome nails look high-effort even though they’re ridiculously fast.
Start with a green gel base. Cure. Rub chrome powder over the entire nail until it looks metallic and reflective.
Choose one or two nails per hand and add diagonal stripes of fine glitter or chunky glitter flakes. Keep the lines random – perfect lines aren’t needed.
The chrome + glitter combo gives major ornament vibes. Seal with a no-wipe top coat so the chrome stays shiny.
5. Dark Green Glitter Ombre Nails
Ombré still gets the job done when you want something bold but not “too much.”
Paint nails with a dark green base. While the polish is tacky, use a makeup sponge to dab glitter onto the tips, creating a gradient.
Add more glitter at the edges and fade it lightly toward the center.
If you want more depth, layer two glitter shades – fine glitter first, chunkier glitter at the very tip. Top coat to blend everything smoothly.
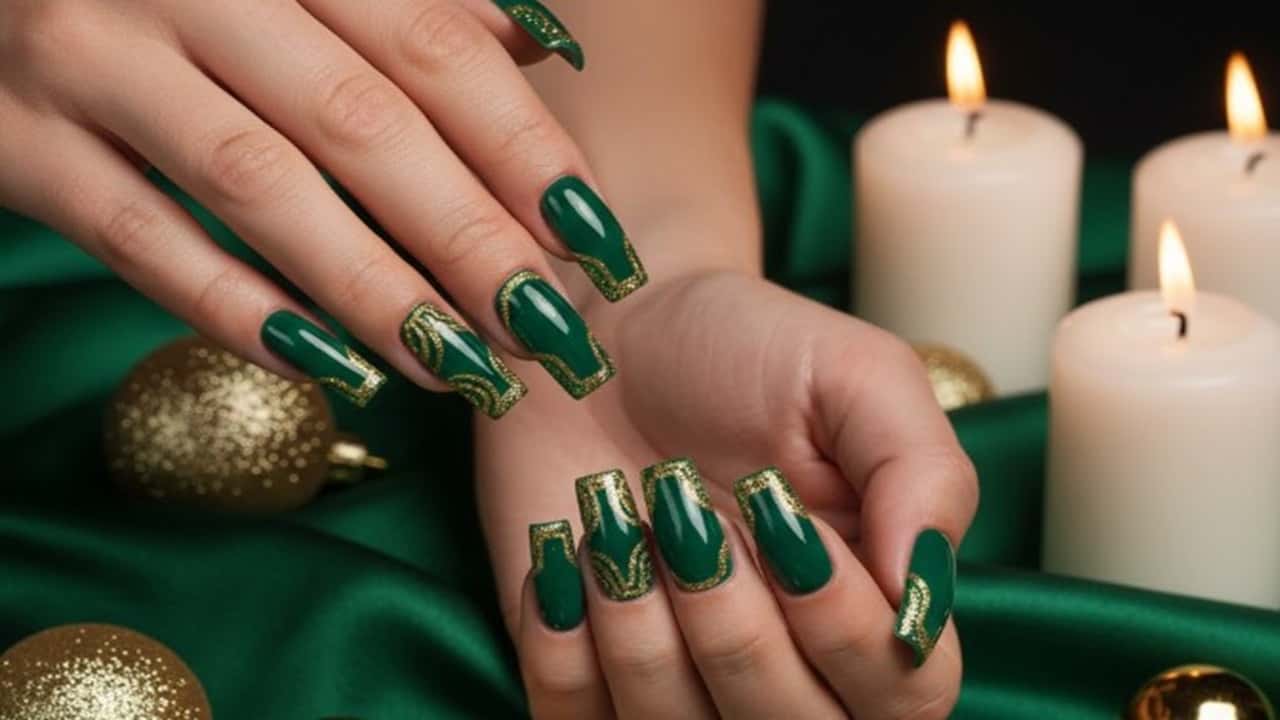
6. Olive Green Nails with Chunky Gold Glitter Tips
Olive isn’t the first shade people think of for Christmas nails, but once you add chunky gold glitter, it suddenly screams festive chic. Paint all nails olive green. Let them dry.
Then grab a chunky glitter polish and apply it only to the top 30% of the nail, letting the pieces fall naturally.
Don’t try to place glitter perfectly – imperfection makes it look better. If you want extra sparkle, add a second glitter layer on just the edges. Finish with a thick top coat so the chunky bits don’t poke out.
7. Deep Green Glitter Striped Nails

This design looks like you spent hours on it, but it’s basically just tape and glitter.
Paint nails in a deep green shade. Once dry, apply thin striping tape at random angles – two or three strips per nail works fine.
Brush glitter polish over the taped areas, then peel the tape while the glitter is still wet. You’ll get crisp, clean glitter lines that look super professional. Great for short nails too.
8. Green Glitter Half-Moon Nails

Half-moon nails are classy, but when you add glitter, they turn into full holiday energy.
Start by painting the nail with a sparkly green glitter polish. Let it dry. Then use circular nail guides (or reinforcement stickers) placed at the cuticle to block off the half-moon shape.
Paint the rest of the nail with a darker green shade. Peel the guide to reveal a perfect glitter crescent. Seal with top coat. Looks complicated. Isn’t complicated.
9. Pine Green Nails with Silver Glitter Stars
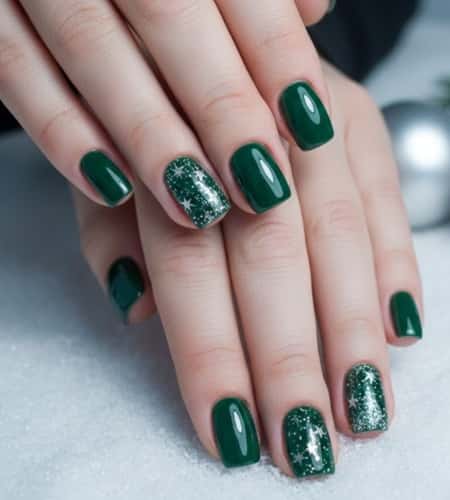
Want something cute but not cartoonish? Try this. Paint all nails pine green.
On two accent nails, use a dotting tool to place tiny silver glitter stars. If you don’t have star-shaped glitter, create small starbursts using a thin brush and silver glitter polish.
Add a couple of small silver dots around each star to give that twinkling-night vibe. Seal everything with a glossy top coat so the stars stay shiny.
10. Bright Green Nails with Glitter Outlines

This one looks bold and modern. Paint nails a bright Christmas green. Let them dry fully.
Then outline the entire nail with a thin glitter border using a fine brush. You can use gold, silver, or green glitter – whatever matches your vibe.
The outline creates a framed effect that looks graphic and trendy. Perfect if you want something different without going wild. Top coat to lock it all in.
11. Evergreen Nails with Glitter Cuticle Arcs
Instead of putting glitter on the tips, flip the script and keep it near the cuticle. Paint all nails in a rich evergreen shade.
After they dry, use a thin nail-art brush to paint a curved arc of glitter right along the base of each nail.
Keep the arc thin – too thick and it looks chunky instead of elegant.
If you want extra dimension, layer fine glitter first, then add a couple of chunky pieces right in the center of the arc. Finish with a glossy top coat. It’s subtle but still festive.
12. Green Velvet Cat-Eye Nails with Glitter Accents

If you want nails that look like luxury ornaments, cat-eye polish is the answer.
Start with a deep green magnetic gel. Before curing, hover the magnet above the polish until you see that velvety stripe form. Cure it.
Pick one or two nails and add thin diagonal glitter accents – just enough to catch light without stealing the show.
Don’t drag the glitter across the cat-eye stripe or it’ll muddy the effect. Seal everything with a glossy top coat.
13. Mint Green Glitter Swirl Nails
Mint green brings a fresh, playful vibe to holiday nails.
Paint nails in a mint base color. Once dry, take a thin brush and draw swirling lines using a glitter polish – think flowing candy-cane stripes but make them sparkly and abstract.
Keep the swirls loose and curvy. Don’t try to make them identical; variation makes them look more artistic. Add a few small glitter dots around the swirls for dimension. Top coat the whole thing to smooth out texture.
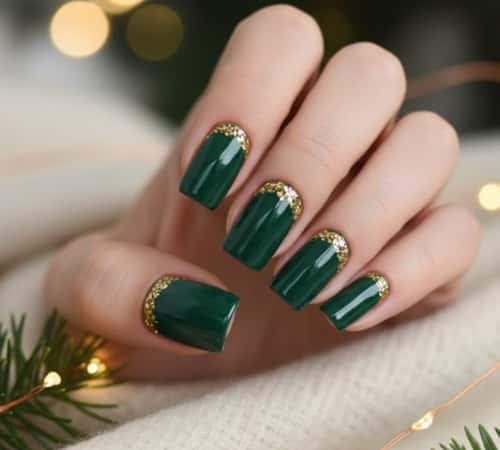
14. Emerald Nails with Gold Glitter Frames
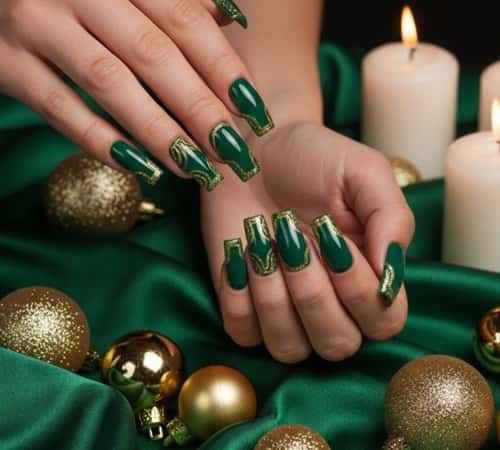
This design gives expensive energy without requiring any skill. Paint the nails emerald green. After they dry, outline the entire nail shape using a thin gold glitter polish.
You don’t need a perfect outline – slightly uneven edges actually make it look more hand-painted and luxe.
On accent nails, draw a second inner outline to create a double-frame effect. Seal with a thick top coat so the glitter stays smooth.
15. Green Glitter Full-Color Nails with Star Confetti

Sometimes you just want full glitter glam. Paint nails with a solid green polish first, so the glitter has something to cling to.
While the second coat is still tacky, press green glitter polish or loose glitter onto the entire nail.
Tap gently so it spreads evenly. Add a few star-shaped confetti pieces on the accent nails, placing them with a toothpick. Press them flat so they don’t lift. Seal with two layers of gel top coat to smooth everything out.
Final Thoughts
Glitter nails can feel intimidating until you realize most of the magic comes from layering, not perfection.
The real secret is patience – letting each layer dry properly makes the difference between “salon-like” and “why is this lumpy?” If you’re experimenting with glitter at home, work near good lighting so you can see how evenly it spreads.
And don’t underestimate the power of a thick top coat; it smooths texture, protects the sparkle, and makes every design look instantly more polished.
If you’re posting your manicures online, try photographing them against textured holiday backgrounds – knits, ornaments, ribbons. It makes even simple designs look stunning.